If you are looking for a simple 3 wire alternator wiring diagram, you are probably trying to understand how to connect your alternator without getting lost in complicated instructions. A 3 wire alternator is a popular choice because it is reliable, easy to install, and works well in most vehicles. In this guide, we will explain everything in plain language so even if you are new to wiring, you can follow along without confusion. We’ll cover what each wire does, how they connect, and why the wiring works this way. No complicated jargon, just easy steps you can trust. Whether you are replacing an old alternator or setting up a new one, learning this simple 3 wire alternator wiring diagram will save you time, money, and headaches.
A simple 3 wire alternator wiring diagram is more than just lines on a paper—it’s the map that shows how your alternator powers your vehicle. In this type of alternator, there are three important wires: one for charging the battery, one for sensing voltage, and one for switching on the alternator. Each of these has a role in keeping your battery charged and your electrical system running smoothly. The best part is, you don’t need to be a mechanic to understand it. We’ll also go over some common mistakes people make when wiring and how to avoid them, so your setup lasts a long time. By the end, you’ll know exactly how a simple 3 wire alternator wiring diagram works and how to do it yourself with confidence.
What is a Simple 3 Wire Alternator Wiring Diagram?
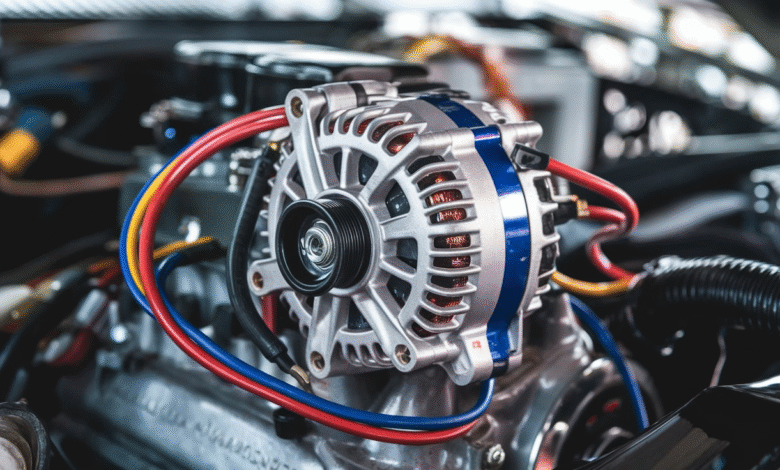
A simple 3 wire alternator wiring diagram is like a small map that shows how to connect the three main wires of an alternator. This alternator is common in cars, trucks, and boats because it is simple but works very well. The first wire goes to the battery to send power. The second wire is for sensing the voltage so the alternator knows how much power to give. The third wire connects to the ignition switch to start the alternator working when the engine is on. This type of wiring helps the alternator keep the battery charged and supply power to lights, radio, and other parts. The diagram makes it easier to follow the right steps and avoid wrong connections. If you understand the simple 3 wire alternator wiring diagram, you can fix or install one without much trouble.
Why Use a 3 Wire Alternator Instead of a 1 Wire?
A 3 wire alternator is better for many people because it gives a more stable and safe power supply compared to a 1 wire alternator. The 1 wire version is simple to set up, but it cannot sense battery voltage well, which may cause undercharging or overcharging over time. The 3 wire alternator uses a sensing wire that checks the battery voltage and adjusts output as needed. This helps keep your battery in good condition for longer. It also turns on faster when the engine starts, making it more reliable in different conditions. Many people prefer a 3 wire alternator because it handles heavy loads better, especially when running lights, fans, or sound systems. The small extra effort in wiring pays off with better performance, longer battery life, and fewer electrical problems in the future.
Understanding the Three Wires – Battery, Sense, and Ignition
The three wires in a simple 3 wire alternator wiring diagram each have a special job. The battery wire is the thickest and carries the charging power from the alternator to the battery. The sense wire is thinner and checks the battery’s voltage level. This lets the alternator adjust power output so your battery is not overworked. The ignition wire is connected to the ignition switch and tells the alternator when to start working. Without this wire, the alternator will not begin charging. These three wires work together to keep your battery full and your vehicle running smoothly. Understanding what each wire does makes wiring safer and easier. If you mix them up, your alternator may not charge properly or could even damage electrical parts, so following the diagram correctly is very important.
Step-by-Step Guide to Wiring a 3 Wire Alternator
Wiring a 3 wire alternator is easy if you follow the steps in order. First, connect the battery wire from the alternator output stud to the positive battery terminal. Use a strong cable so power flows without problems. Second, connect the sense wire to the battery positive terminal or to a point in the wiring that has full battery voltage. This helps the alternator know when to adjust power. Third, connect the ignition wire to the ignition switch so the alternator turns on only when the engine is running. Make sure all connections are tight and secure. After wiring, start the engine and check with a voltmeter to see if the alternator is charging. Following this simple 3 wire alternator wiring diagram will help avoid mistakes and keep your battery healthy for a long time.
Common Mistakes When Following a Simple 3 Wire Alternator Wiring Diagram
When wiring a 3 wire alternator, people often make small mistakes that can cause big problems. One common mistake is mixing up the sense wire and the ignition wire. This will stop the alternator from charging. Another issue is using thin or weak wires for the battery connection, which can lead to overheating or poor charging. Some people forget to secure the wires, and vibrations from the engine can make them loose over time. Skipping the step of checking with a voltmeter is also a mistake because it’s the only way to confirm the alternator is working right. Always follow the wiring diagram exactly and double-check your work. Taking a little extra time to check each step can save you from battery problems, alternator damage, or even electrical fires later.
Tips to Keep Your Alternator Working for Years
To keep your alternator working for a long time, always make sure the wiring is clean and tight. Loose wires can cause sparks and reduce charging power. Check the belt that drives the alternator to see if it is tight and in good condition. If the belt is worn or slipping, the alternator will not charge well. Keep your battery terminals clean so the alternator can send power easily. Also, avoid overloading your vehicle with too many electrical devices, as this can make the alternator work too hard. If you hear strange noises from the alternator or see dimming lights, check the wiring and belt right away. A well-installed and well-maintained 3 wire alternator can work for many years without giving trouble.
Troubleshooting a 3 Wire Alternator Setup
If your 3 wire alternator is not charging, start by checking all the wire connections to make sure they are tight and in the right place. Use a voltmeter to see if power is flowing from the alternator to the battery. If the voltage is low, check the sense wire to make sure it is connected to a point with full battery voltage. Also, check the ignition wire to ensure it gets power when the key is turned on. Sometimes, a blown fuse or a bad belt can be the cause. If everything is connected and the belt is fine, the alternator itself may need repair or replacement. Following the simple 3 wire alternator wiring diagram while troubleshooting makes it easier to find the problem and fix it quickly.
Final Thoughts on Installing a 3 Wire Alternator
Installing a 3 wire alternator may seem tricky at first, but once you understand what each wire does, it becomes simple. The battery wire sends power, the sense wire checks voltage, and the ignition wire tells the alternator when to work. Following the wiring diagram step-by-step makes sure you connect everything safely. This type of alternator is very reliable and works well for many types of vehicles. If you take your time, double-check your connections, and test with a voltmeter, you can get it right the first time. A well-installed 3 wire alternator will give you strong charging power and keep your battery healthy for years.
Conclusion
A simple 3 wire alternator wiring diagram is a very useful tool for anyone working on their vehicle. It helps you see exactly where each wire goes and makes the job much easier. Even if you are new to wiring, you can follow the steps and get good results. By understanding the battery wire, sense wire, and ignition wire, you will know how the alternator works and how to connect it properly.
Taking your time and checking your work can make a big difference. Make sure you use the right size wires, keep your connections tight, and check everything with a voltmeter. Once installed correctly, your 3 wire alternator will work for a long time without giving you trouble. This small bit of learning can save you money, keep your car running well, and make you more confident in doing small vehicle repairs yourself.